During Christmas, most of you may hold a family reunion. Need any tips for planning a great one and preserving the good memories?
At a family reunion, you can not only share time with loved ones, but also meet your new relatives. You can seize this opportunity to gather precious genealogy information. It will be a rewarding experience. Furthermore, you can collect many stories that happened in the last year, and took photos of your families as a souvenir. The reunion itself will become part of the lore of family history.
Here I would like to list some tips for planning a great family reunion during Christmas step by step. Hope these tips can help.
->Decide what kind of party to have and where to have the reunion.
->Determine who will be in charge of the event. Ask for volunteers if necessary.
->Choose a suitable date. The more people you plan to invite, the more advance notice you will need to give. Leave plenty of time for your guests to plan.
->Make a guest list. Start with the people for whom you have complete contact information. Then call them to jog your memory about long-lost relatives.
->Formulate a budget. It depends on how many people will be invited. So make your guest list carefully first.
->Determine who will handle expenses. In most cases, each family member shares the cost of the event.
->Prepare invitations and mail them out. Note you should include all the important details about the reunion in the invitation. Leave plenty of time for people to respond and ask everyone to make you know if they will attend.
->Give a phone call to verify the guest list after the invitations. Because during Christmas, schedules are always hectic.
->Reserve rooms at a hotel near the reunion site if necessary. Many hotels offer discounts for special events which require several rooms during Christmas.
->Review all arrangements again. Make sure all things are prepared well. Ensuring rooms are ready, food is served promptly and accommodations are comfortable.
->Make your family reunion memorable. Take plenty of photos. Hire a professional photographer or a video-camera person to film the reunion, or assign this task to an experienced family member. You also need to prepare some funny activities for the reunion.
->Get a volunteer or volunteers at the reunion to make out something valuable that includes stories, photos and news items from the reunion. Then send a copy to all your families who have attended the reunion.
As it how to preserve the photos and videos taken during the family reunion, here is a small tip that may very helpful.
Insert all your photos and videos into PowerPoint. Add certain descriptions and background music into it. Or directly make a photo album with PowerPoint. After finishing making the PowerPoint, you can burn the PowerPoint to DVD with DVD menus. Then send a copy of the DVD disc to each member who has attended the family reunion as a Christmas gift.
You can click here to know how to burn PowerPoint to DVD with DVD menus step by step.
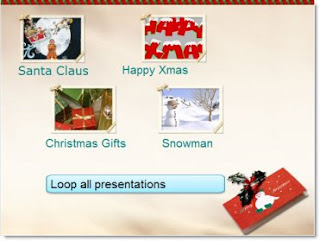
Advantages of doing so:
->PowerPoint is easy to operate. It allows users to form the content freely
->DVD discs are ideal for long-time store. And DVD is supported by most computers and players.
Enjoy the happy hours spent with families and have a merry Christmas with these small tips. Leave a valuable Christmas memory in mind forever.
Friday, December 19, 2008
Sunday, December 14, 2008
Christmas ideas – Making Christmas card with PowerPoint and podcast it on YouTube
Christmas is around the corner! Want to wish your dear ones blessings of joy on this special day? Sending elegant Christmas cards may be a good idea. Especially with the development of the Internet, more and more people tend to send electronic cards instead of paper-based ones to their friends and relatives.
Compared to the traditional cards, ecards are lively and more environment friendly. Besides, it is faster to give your wish by sending an ecard than mailing a postcard. As PC computers getting popular in modern life, ecard is easy to be accessed.
There are many web sites online on which you may find thousands of stunning Christmas cards. But many of them are alike, and no one allows you to create your own. How about DIY your own Christmas ecards? It will be more fun and you are allowed to make full use of your imagination to make your own e-card as interesting as possible. Send the most sincere greetings to your dear ones. Now, let me show you the way of making your own Christmas card.
Since MS PowerPoint and Windows Movie Maker are available on most computers, below is a way of how to make a special and lively Christmas card yourself with the help of these two tools step by step.
1. If you want to personalize a video in your Christmas card
You can make use of the free tool Windows Movie Maker which comes with all Windows XP and Vista installed computers. You can either directly capture a video from the video capture device or make one with existing videos, pictures and music. After the video is OK, you can further add effects, transitions and titles to the video. In simply 3 steps, a personalized video will be created.
Below is an example of how to capture a video for your Christmas card with WMM:
- Click Capture from video device in the Movie Tasks menu
- In the coming page, you can set the Mic Volume and configure the camera&Video settings
- Click Next। Then you will be able to see a blank needs you to enter a file name for your captured video and the place you want to save it on your computer.
- Click Next to continue। In the coming page, choose the video setting for your captured video। Choose Best Quality for Playback on my Computer is recommended।
- Go on clicking Next to the last step। In this page, you can start to capture video by clicking Start Capture, end the capture by clicking Stop Capture.
- After you have finished capture a video yourself, click Finish to end this process। The captured video will be displayed at the Collection area. Drag it to the video area in Timeline board. If you still want to add other pictures or music to form your video, you can do this by clicking Import Pictures and Import Audio or Music in the Movie Tasks menu. Then drag all of them to the corresponding area in Timeline board below.
- Right click each object in the Timeline board. Then you will be able to set the Video Effects and the Play Timeline for them.
- After you have adjusted all the settings for your video, you can save the video onto your computer by clicking Save Movie File in the File tab.
2. Form the content of your Christmas card with PowerPoint
As PowerPoint allows you to insert customized backgrounds, characters, pictures, animations, movies, and etc, you can take this advantage to make the content of your Christmas card colorful and meaningful. The video you made with Windows Movie Maker can also be inserted into the PowerPoint. Besides, you can input greetings and warm wishes into the PowerPoint.
In this process, you just need to make full use of your imagination to create the e- card.
3. Turn the PowerPoint you made to video format
The last step for making your own e- card is to convert the PowerPoint you made to video format. In this way, you can make your e- card look like a movie and upload it to websites such as YouTube for wide sharing. After that, you can send out your Christmas greetings just with a video or a website link.
Here you can try this tool: Acoolsoft PPT2Video Converter, it is designed to convert your PowerPoint to almost all popular video formats such as MPEG, AVI, MP4, WMV, 3GP, FLV and MOV.
Currently, the company has launched their Christmas sale, each product are sold at a favorable price.
Here are two DIY Christmas cards from YouTube:
http://www.youtube.com/watch?v=7SLY_HfO-pQ&feature=related
http://www.youtube.com/watch?v=yRfvSOuwM_4&feature=related
Interesting? Take actions now, make Christmas ecard by yourself. Send out your warmest and most sincere greetings to your friends and relatives. Have a merry Christmas!
Subscribe to:
Posts (Atom)