Sunday, February 15, 2009

5 Ways to Convert PowerPoint to Video

Benefits of PowerPoint
PowerPoint is a powerful presentation application which is very commonly used by lectures, businessmen, students, trainers, etc. It is easy to use and featured with a lot of functions to create interesting and dynamic slide presentations. This has made it widely accepted and utilized.

Benefits of Video
Video is powerful because it’s demonstrative, clearly depicting procedures, techniques or visual information such as charts and graphs. Most of all, video showcases charisma of live images and animations, allows for transparency and communication skills, which can lead to trust. It is also a good idea to make videos for special occasions as a way of watching them and reminiscing the good times.

Benefits of converting PowerPoint presentations to video
-> Display your presentations in a more vivid way
-> With PowerPoint in video format, it is easy for uploading to blog and websites
-> Even there is no computer, you can also view your presentations
-> Videos can be uploaded to portable devices such as iPhone, iPod and Pocket PC

5 Ways to Convert PowerPoint Presentations to Video (free ways and cost-effective ways)
Method 1: Upload your presentations to http://www.slideshare.netwhich is one of the world’s largest communities for sharing presentations. It can generate video for your presentations.
After uploading your presentations onto it, you can directly download the generated video onto your own computer, or embed the video to your blog.
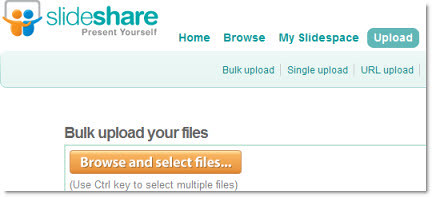
But there are limitations to the presentations uploaded to it. Max size of the presentation is limited to 100MB; animations, video clips and other complex elements couldn’t be added; PowerPoint 2007 is not supported. Sometimes, objects inserted into the presentation may be modified after the uploading.

Some other similar online PowerPoint sharing sites such as http://www.authorstream.com and http://www.slideboom.com/ also support generate video for the presentations uploaded. The advantage is that you don’t need to download any programs onto your computer and they are all free. If your presentation’s size is not too big, and there are only texts and pictures in your presentation, you can have a try at these sites.

Method 2: Use Camtasia which costs $299 to record your presentation and then generate a video
Step1: In the Task List, select Record PowerPoint.
Step2: Open a PowerPoint presentation to record.
Step3: Select the recording options from the PowerPoint Add-in Toolbar. Click the Record button.
Step4: The presentation opens in presentation mode. A Camtasia Studio dialog opens in the lower right corner of the screen. Click the Click to begin recording button.
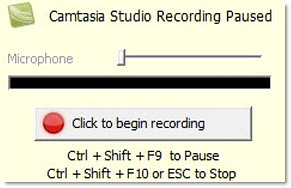
Step5: Progress through the PowerPoint presentation slides. To stop the recording before the last slide, press . To stop the recording at the end of the presentation, click Stop recording.
Step6: Enter a file name and location and click Save. The presentation recording saves as a Camtasia Studio recording file.
Advantages with this method: The program can capture slide timing, animations, sound effects, webcam video and any applications displayed on screen during the presentation. You can also record your own narration while the screen-capture process is being carried out.
Disadvantages: This program eats huge system resources. If the configuration of your computer is not so good, animations may become laggy or even lost.

Method 3: Convert PowerPoint presentation to video with Acoolsoft PPT2Video Converter
Step1: Download this PPT2Video Converter and install it on your computer.
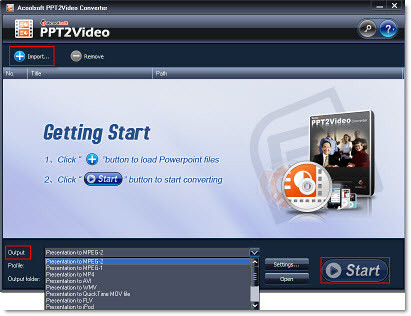
Step2: Launch the program. Click Import button to choose the presentation you want to convert, choose an output format for the video you want to generate. And then click Start button to start the conversion process. (This program can convert presentations to video in MPEG, AVI, MP4, WMV, 3GP, FLV and MOV.)
Step3: Upload the video to blogs or websites such as YouTube.

Method 4: Use Windows Movie Maker to create a video for your presentations
Windows Movie Maker comes with all Windows XP and Vista installed computers. With this method, it may time consuming and animations in your presentation would be lost after the conversion.
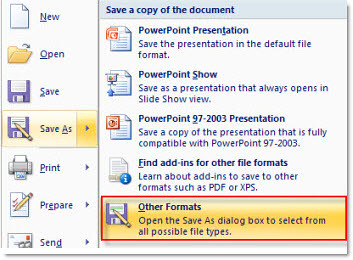
Step1: Save your PowerPoint slide show as “PNG” images.
Step2: Import the images to your Windows Movie Maker.
Step3: Select all the imported images and then add them to Storyboard.
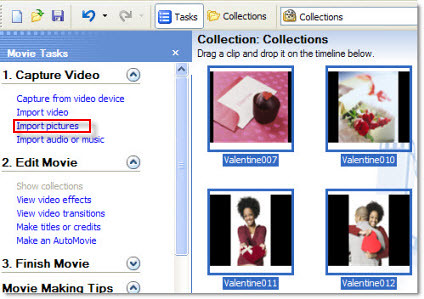
Step4: Add video effects to the slides (Optional)
Step5: Save the slide show as Movie File.

Method 5: Make a QuickTime movie on Mac
Export your presentation as a QuickTime movie “PowerPoint Movie”. Then you can save your presentations to MOV video file. Way to do this: click File -> Make Movie
But in this way, sounds and animations couldn’t be retained. If you are using keynote, just export your presentation to QuickTime file directly.

Take the advantages of PowerPoint and video. Convert your presentations to video. Share your presentation with more people and create a more convenient way to view your presentations.

Friday, February 6, 2009

Valentine Gift Ideas for Your Beloved

Valentine's Day is a holiday celebrated by many lovers all over the world, what you plan to do as the Valentine's Day approaches? Presenting flowers, exchanging confectionery, or sending Valentine's cards? This exceptional day of lovers allows everyone to give out the most fascinating things and speak up the never expressed things. Here are some perfect valentine gift ideas and tips that you can make your beloved happy.


There are plenty of options to choose. But before selecting any gifts for your beloved online, you need to put a lot of creativity, thinking and time. A gift for your beloved should largely depend on the personality of the individual. A Valentine Gift that suits the personality of your beloved will be considered as ideal.
1. Choose chocolates
If you want to make a great impression for your sweetheart on this Valentine, not to mention the feeling of cheerful surprise as your beloved receives this special valentine gift. You can choose heart-shaped chocolate, select a very romantic card and add some sweet message in it, then wrap it up to send to your beloved. This chocolate gift idea for your sweetheart promises to make her love you forever.

2. Choose candy
Surprise your Valentine with a gem of a candy collection or candy gift baskets. Candy gifts come in various types and categories suiting your sweetheart's mood and taste, not to mention affordability because candy would not be too expensive. With the aid of the various candy stores you can also order for various types of decorative candy boxes for your beloved. You can gift your spouse with a special candy bouquet.

3. Choose flowers
The meaning and beauty of flowers has captured our imagination so much that even words cannot match its power when it comes to expressing love. The perfect choice of a Valentine flower is the red roses, distinctly expressing love in its eternal form. The single stem of a rose also called “signature rose” is the most preferred choice of most Valentine lovers. Red, pink and white roses are the most sorts after Valentine Flowers. Red rose symbolizes passion, white purity and the pink rose is a blend of both.
For more flowers information you can browser Proflowers and Flowerpetal

4. Choose jewellery
Jewellery doesn't mean that it has to cost you a lot especially during the period of economic recession. My guess is she must be having many pairs of earrings and chains. So why not gift her something that she might just have one or even none. Select a nice anklet from a nearby jeweler and gift to her as a Valentine gift, you can select from different styles for her. So indulge yourself in this season of love with some great valentine jewellery ideas. Let your sweetheart remember you with this special moment lock inside her heart forever.

5. Record your romantic stories
Valentine's Day is a golden chance of expressing your love to your beloved. You can make up for all the time lost with great romance collage. Considering paper ones are easily damaged, you can create PowerPoint with snaps to cherish the memory of your love of joy. Under each Slide you can write a specific thing about your sweetheart, like "I miss your smile", "I miss you ". It will be a big fortune for you both. Presenting a sincere romance story in such a way could be an ideal Valentine's Day gift idea even if valentine flowers are not attached with it. For long-time preserve you can convert the PowerPoint to video or DVD instead papers. Here is a sample from YouTube http://www.youtube.com/watch?v=IbrOSNsNUWo . Want to know how to do it? You can click here. Here are also some free PowerPoint templates.
Below is a DVD Menu of the tool.

These are just part of my ideas, do you have any more? Please show it to your sweetheart this Valentine's Day.

Thursday, February 5, 2009

Free Valentine's Day PowerPoint Templates

Here are some free PowerPoint templates for Valentine's Day:


For more free ones, you can Click Here.

Monday, January 19, 2009

How to Burn PowerPoint to DVD with DVD Menus

Burning PowerPoint to DVD is a good solution of preserving PowerPoint presentations and preventing them from being edited by others. Also, by burning PowerPoint to DVD is ideal for viewing PowerPoint presentations through various media. But have you ever thought that you can create DVD menus for your presentations to be viewed on TV with a DVD remote control just like a movie?

With eye-catching DVD menus, one can easily catch audience’s attention and set quick navigation for the PowerPoint presentations. Here below is a ready-made DVD menu for some PowerPoint presentations.


Also want to make one for your own presentations? So follow the step-by-step guide of how to burn PowerPoint to DVD with Acoolsoft PPT2DVD and create stunning DVD menus.
1. Install Acoolsoft PPT2DVD on your computer and open it. You can get it free from here.

2. Click Import button to choose the presentations you want to convert.

3. Click DVD Menu button on the top navigation, and then you will come to the DVD menu page. Click DVD Menu Creator button, then you will be able to start to customize the DVD menu for your presentations.

Here you can set the background, button style, frame style, icon style, caption and more to the current selected menu. In the preview area, it shows the preview for the current menu, and changes will be shown in real-time when you design it. Tool pane is used to set properties of current menu.

4. Tool Pane:


In the Background tab, you can choose a background for your menu from the gallery that the program itself offers, or choose one from your own computer. There are several different types of background for you to choose, including business/exhibition type, education/training type, holiday/celebration type, nature/environment type, religious/spiritual type and others.
You can also set background music for the current selected menu by clicking Background Music button.
In the Button Style tab, you can set the button style, frame style and the icon style for each of your menu. There are many different options for you. You can choose a proper one according to your own interest.
Apply to All is used to apply your settings to all your menus.


In the Caption tab, you can edit the caption of a selected object just as in word.
In Advanced tab, you can tick Disable this menu button to disable current menu, and you will need to select an action that will be taken at the end of show. In Menu Options, it lists the options on current menu. You can remove corresponding object by removing the tick of the item.

5. Want to see how the DVD menu you’ve created will work in real time? So follow this step. On the top right of the DVD Menu page, you can see a DVD remote control simulator.

This is a soft-remote-control integrated in menu simulator. You can find those buttons on normal DVD remote controls. The simulator includes four cross direction selection buttons, which allow you to select items on the menu, and the center one is the confirm button. The Menu and Title button are for switching to different menus when playing presentation.

6. Choose output options, video settings and advanced settings for your presentation and burn your PowerPoint presentations to DVD without attendance.

It’s all that easy to finish the whole process of designing specific DVD menu for your PowerPoint presentations. Start now, burn PowerPoint to DVD and enjoy the happy time it brings to you. Click here to learn more about how to burn PowerPoint to DVD.